Existing Teams Users
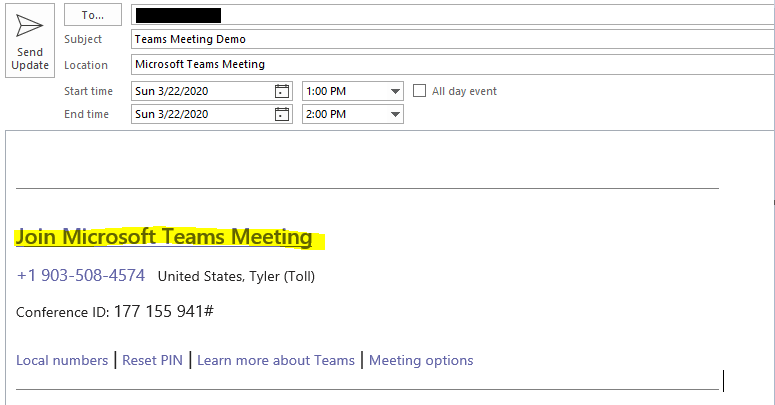
1. Locate Conference Information: Locate the conference information required to connect to the meeting. It is typically sent through one of the following ways:
2. Open “Join Microsoft Teams Meeting” Link: Open the meeting URL and you should see a notification like the one below:

3. Select “Open Microsoft Teams” Option: The Microsoft Teams application should launch and bring you to the following window:

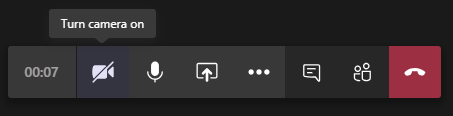
4. Modify Connection Settings (Optional): You can toggle off your microphone and video camera prior to joining the meeting. Left means off and right means on.

These settings have the video camera turned off and microphone turned on.
5. Click “Join now” to Connect: You will be connected to the conference call. Your audio will use your default computer settings for the microphone and speakers. If you are having issues with the audio, you can also join by phone using the Join Audio by Phone Using Desktop Application optional instructions below.
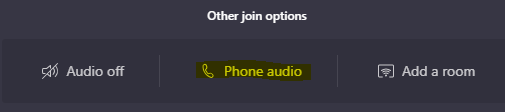
1. Click the “Phone audio” option under other join options.
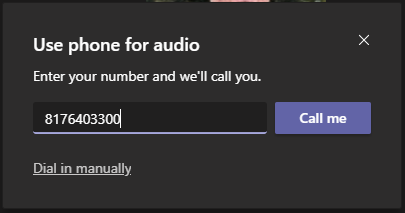
2. Enter Your Phone Number and Select Call Me.
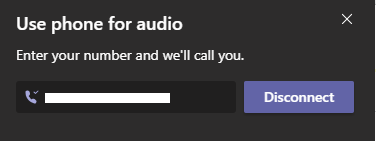
3. Answer the Call and You Will Be Connected: The “Call me” button should change to “Disconnect.” Once you are connected, you can close the window.

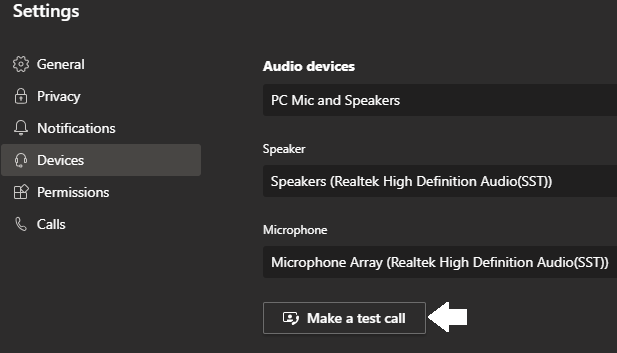
2. Select Devices: In the settings window, click on the devices option on the left.
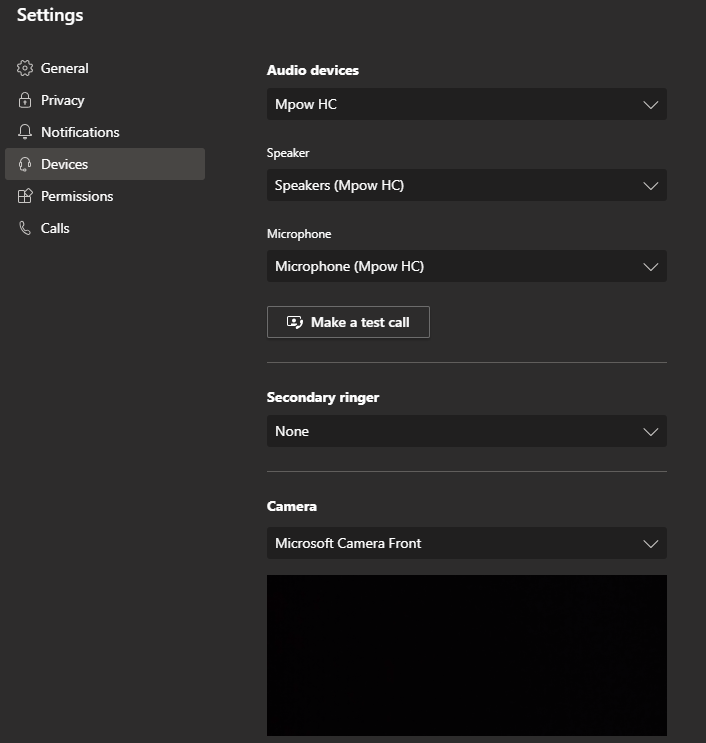
3. Select Device: Using the dropdown menus, you can change the device for you speakers, microphone, and camera. Here is an overview each option:
4. Test Call: If you would like to figure out what settings work best prior to the meeting, you can perform a test call. Once you have the settings that work best for you, please make a note for future reference.
- Calendar Invite: A meeting was created, and you were added to the invitation.
- Emailed Instructions: The meeting information was emailed to you.
2. Open “Join Microsoft Teams Meeting” Link: Open the meeting URL and you should see a notification like the one below:
3. Select “Open Microsoft Teams” Option: The Microsoft Teams application should launch and bring you to the following window:
4. Modify Connection Settings (Optional): You can toggle off your microphone and video camera prior to joining the meeting. Left means off and right means on.
These settings have the video camera turned off and microphone turned on.
5. Click “Join now” to Connect: You will be connected to the conference call. Your audio will use your default computer settings for the microphone and speakers. If you are having issues with the audio, you can also join by phone using the Join Audio by Phone Using Desktop Application optional instructions below.
If you are having issues with audio, please see the optional step to change audio settings in the desktop application.
Optional Steps
Join Audio by Phone Using Desktop Application
If you do not have a microphone on your computer, you can join by phone. This will allow you to still see video and screen shares through your computer but use the phone for audio.1. Click the “Phone audio” option under other join options.
2. Enter Your Phone Number and Select Call Me.
3. Answer the Call and You Will Be Connected: The “Call me” button should change to “Disconnect.” Once you are connected, you can close the window.
If you are having issues you can use the manual dial in options. For instructions on how to manually dial in to the conference, please see Phone Dial-In Instructions.
Change Audio Device Settings in the Desktop Application
1. Open Settings Configuration: Click your image at the top right of the window and select settings.2. Select Devices: In the settings window, click on the devices option on the left.
3. Select Device: Using the dropdown menus, you can change the device for you speakers, microphone, and camera. Here is an overview each option:
- Audio Devices: This option will change both the speaker and microphone options below. It has pre-configured settings based on the devices Teams has detected. You can start here and if that does not work, you will need to do a Custom Setup.
- Speaker: This option allows you to adjust the speaker(s) used for Teams. If you are not sure on your option, you can switch between them to determine which one is correct. Also, please make sure that your speakers are on and the volume is up to a level where you can hear it.
- Microphone: This option allows you to select the microphone. Most devices will only have one option here unless you have a headset, web cam, or are connected to an external microphone. If you are not sure, you can adjust these settings until others can hear you.
- Secondary Ringer: This option is rarely used and only applies to incoming calls. It is not relevant to conference calls.
- Camera: This option allows you to set your camera. Many devices have a front and rear camera so you can change that here. If you have a web cam or external camera, you can also select that from the list. If you are not planning on using a camera, you can ignore this option. Your camera must be enabled in the meeting for this option to work.
4. Test Call: If you would like to figure out what settings work best prior to the meeting, you can perform a test call. Once you have the settings that work best for you, please make a note for future reference.